Category: Travel Photographer: Steve Stanger View from 9/11 Memorial This is a really unique perspective which I have never seen. There are great leading lines and framing to guide us down through the image to the city and reflections. The tones emphasize the steel, sterile and cold feeling this has which I imagine is how

|
In 2013, a small quadcopter flew close to German Chancellor Angela Merkel who was attending an outdoor political meeting. A year later an inebriated federal agent crashed his Phantom in the White House perimeter. Fortunately, the drone did not damage Michelle Obama's vegetable garden, but following this event DJI implemented the no-fly zone feature on its entry-level drones. However, this measure is not completely effective to prevent rogue flights and authorities are looking for solutions to counter drones from flying in restricted areas. Let's review the current anti-drone solutions and challenges associated with neutralizing a small UAVs. [ Read More ]
With a little work, it's possibly to create fairly convincing lens blur using Photoshop. This tutorial will show you just how to do just that. [ Read More ]
Today's Photo Of The Day is Sandstorm Light by Tim Williams. Location: White Sands National Monument, New Mexico. Thunderstorm outflow kicked up a mighty sandstorm, which luckily coincided with the sunset hour and some amazing light, explains Williams. Taken at White Sands National Monument during the monsoon season. Follow Tim Williams on Facebook to see more of his photography. Photo of the Day is chosen from various OP galleries, includingAssignments,Galleriesand theOP Contests. Assignments have weekly winners that are featured on the OP website homepage,Facebook,TwitterandInstagram. To get your photos in the running, all you have to do is submit them. The post Photo Of The Day By Tim Williams appeared first on Outdoor Photographer. YI Technology has updated its website to state that it has upgraded the YI 360 VR livestream resolution to 4K. When the YI 360 VR was announced as a development project earlier this year its streaming resolution was listed as 2.5K. However, YI's product page for the 360 VR now says: Finally live stream it all, in 4K. As well as 4K livestreaming, the YI 360 VR will also offer 4K in-camera stitched videos and 5.7K still photos and videos (with desktop stitching). 360 Rumors has also spoken to a beta tester of the YI 360 VR who dispels the rumour that the camera will have image stabilisation. The YI 360 VR price tag will be $399, which has excited many 360 camera enthusiasts, as this is far cheaper than many other cameras, like the Garmin VIRB 360, that offer the same resolution. A YI 360 VR release date is widely expected in September 2017. The post YI upgrades 360 VR livestream resolution to 4K appeared first on Camera Jabber.
Vincent Munier is a Nikon ambassador, but more importantly, he's probably one of the best animal and wildlife photographers. He's photographed quite a few subjects in his career, but shooting the snow leopard in its environment was an exceptional project. It's one that Nikon supported and we now can enjoy through this beautiful video. [ Read More ] 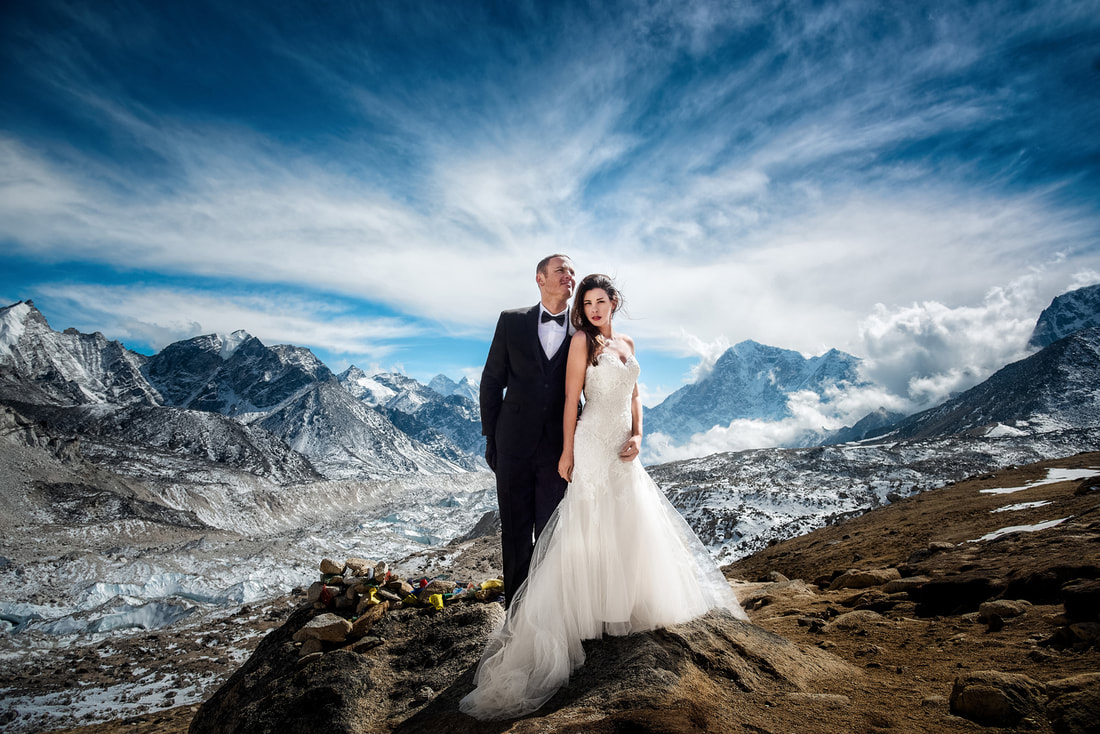 Image copyright Charleton Churchill. All rights reserved. "Why?" started out a year ago as a great way to introduce you to the movers and shakers in professional photography. However, I completely underestimated the variety of images, the passion of each artist and the power of the backstories behind each photograph. Charleton Churchill joins me on this new episode with a remarkable story. I'll let you hear it directly from him, but there is one point I want to share. Social media keeps making the world a much smaller place! I recently "met" Charleton thanks to the Internet and Profoto USA, an SCU partner. While we probably share many common friends in the industry we had never actually met in person. On August 8 I shared his "Tiny Talks" video in the Profoto Showcase. After watching the video and reading his blog, I was blown away by the niche he's chosen for a part of his expertise in imaging - adventure weddings. One phone call later we had this episode of "Why?" scheduled. We're part of an industry built on a solid foundation of passion. As I've written and talked about in the past, the best thing about this industry has very little to do with photography, but the friendships that come out of everyone's love for the craft! Interested in seeing more of Charleton's work? Visit his website and blog with a click on the image above. And, if you're interested in finding out more about Profoto's Off-Camera Flash System, which Charleton talks about in his backstory, just click on the Profoto banner below.   An increase in average sea level rise imperils eastern U.S. cities  Extinction possible for Chinook salmon Have you ever found your photos flat? The colors are muted and it just looks dull? That's because it lacks contrast. Sometimes regardless of your best exposure skills, the conditions are not suited to get a wide range of tones. Not to worry though, it can be fixed in post-processing. I'll show you my workflow for how you can take control of contrast in your images using Curves and Levels in Photoshop. Of course, there are many ways to adjust the contrast on Photoshop, there's even a tool called Brightness and Contrast, however, it doesn't give you much control. What I like to do is to manipulate Curves and Levels. In this article, I'll explain to you why and how I use these tools to boost contrast. The issue of low contrastLow contrast can happen for many different reasons; bad weather for example or photographing through glass. In any case, the resulting image doesn't show a wide range of tones, in other words, there's not enough difference between the lights and the darks. I find this problem occurs especially while traveling, because you can't go back to the location when the weather is better, or because you are seeing things through a pane of glass. For example, the image I will use for this tutorial was taken through the window while traveling on a tour bus.
How do you know it's low contrast?I chose an image where the contrast is clearly low so that you can easily see the effects of every step. However, in some cases, it won't be as obvious, but you can always review the histogram to know the tonal range of your image. A typically correct exposure should have a histogram that reaches from black (left) to white (right) evenly spread, with the highest values in the middle. Please note that this can change if you are going for a different effect like low key or high key where you purposely choose a specific range to work with, so I am just talking about the average image here. As you can see, in this case, all the information is concentrated in the middle tones, but it doesn't reach the black or the white side (see histogram below). This is why the image has no contrast.
Using CurvesFirst, we are going to manipulate the Curves tool. Remember to do it on an adjustment layer and not directly on your original (this is non-destructive editing), that way you won't loose any information and you can always go back and start again if you don't like the results. To do this go to the menu then: Layers > New Adjustment Layer > Curves and a new window will pop up.
You can also get to Curves on the Adjustment panel.
Inside that, you'll find a graph with the histogram on it. The line that crosses the graph controls the contrast; the steeper it is, the greater the contrast.
You can fix anchor points along the line that you can move up or down to adjust the contrast of the image. Add as many anchor points as you need. The higher right quadrant controls the highlights and on the lower left one, you have the dark tones.
If you want to increase contrast, as we do in this case, add one anchor point in the lower left quadrant and slowly pull it down. Watch how it affects the dark areas of the image. Move it until you're happy with the result. Then add another anchor point in the upper right quadrant and pull it up slowly until the highlights are bright enough for your preference. By making the straight line into more of an s-curve you will add contrast to the image. Note: if you have an image with too much contrast the opposite can work. Pull down the highlights, and push up the dark areas on the curve to get an inverted s-curve. After fixing the curves for the overall image, this tool allows you to fine-tune by channel. The step we did before was working on RGB, however, if you click on the drop down menu you can choose each channel to work with separately.
In this case, let's start with the Blue channel. If you pull up an anchor point from the highlights (the upper right quadrant) you are making the sky, which is the lighter part of the picture bluer. In the left lower quadrant (the shadows) pulling the anchor a little bit down allows you to remove some of the color cast.
Nextis green channel so that you can get a wider tonal range out of the forest and nature of the scene. The adjustments are very subtitle because when you are working in such detail the tools become very sensitive. Move around the graph until you are happy with the result.
Remember different light sources have different colors; a sunset has warmer colors than at noon, artificial light can be more yellow than natural light, etc. Apart from correcting any color bias, it works to add some special effects and get creative. In the next example, you can see what happens when the graph gets completely inverted in the red channel. You can also achieve this by playing with the different presets, in this case, color negative.
Using LevelsNext, you want to manipulate the Levels, also using an adjustment layer. You can do this by going to the menu > Layers > New Adjustment Layer > Levels (or you can find it on the Adjustments panel just to the left of Curves). Again a new window will appear with a different graph, this represents the darkest parts of the picture (0) to the lightest parts (255).
You can manipulate contrast by dragging the sliders underneath the graph, however, you will have much more control if you use the eyedroppers. This is how to work with them: First, choose the white eyedropper (bottom one next to the graph) and click on the lightest part of the image that still has information or detail. You'll notice how your entire image becomes lighter and brighter. Don't worry about getting it right on the first try, you can click aroundon the image until you are satisfied with how it looks.
Then pick the black eyedropper and click on the darkest part of the image with detail. Same as the white one, try it until you get it right. You can always do some final adjustments with the sliders as well.
Finally use the gray (mid-tones) eyedropper to set the ambiance or mood of the scene, as it will change depending on where you click. Here some examples:
In Levels, you can also do the selective adjustments by channel if you need. Before and afterAnd there you go, when you are satisfied with your results, flatten the image by going to the menu Layers Flatten Image. See how the histogram has a much wider range now, and the final image has more impact.  Before image.  Before adjustments for reference.  Histogram after Curves and Levels adjustments.  After image. Handling reflections exampleRemember that when you are photographing through glass there might be reflections, and when you boost the contrast these reflections will be much more noticeable. So think about that before shooting, when you are composing your image. In order to demonstrate this for you, I made a photo while enjoying a panoramic view from a skyscraper in Milan. It was a 360 degrees glass wall, so I was bound to have a reflection. In order to use it to my advantage, I decided to place my foot strategically so that its reflection would be in between two buildings and entitled the photo Stepping into Milan.  Before processing.  After processing, notice my foot in the lower left corner? Dull weather exampleAs I mentioned before, it's not only shooting through glass that can give you low contrast scenes. Here I have another example that had to do with the weather. It was a very cloudy day so there were no shadows, everything looked kind of gray and the light was very flat. This too can be fixed with Curves and Levels following the previous steps.
ConclusionNow you know that a low contrast photo doesn't mean you'll end up with a flat or dull image, so shoot away! I hope you found this helpful and if you have any doubts or tips about contrast, please share them with us in the comments section below. The post How to Take Control of Contrast Using Curves and Levels in Photoshop by Ana Mireles appeared first on Digital Photography School.  I'm a big fan of playing offense versus defense and right now, even if you haven't done anything yet, you've still got time for some great offensive marketing plays, especially if your skill set is in portraiture. It's August, and there are so many opportunities in the fall, but you snooze you lose. It's Marketing Monday - take the time to think through your plans for the rest of the year and let's get you carrying the ball instead of chasing it! 1) Holiday Portrait Gifts: There isn't a mother on the planet who doesn't want new pictures of her family, but you've got to plant the seed for fulfillment. Even more important there isn't a grandmother who doesn't complain about not having up to date images of her grandchildren! When was the last time you did a holiday promotion? When was the last time you did a mailing or a blog post to get people thinking about how outdated their family portraits are? Making it even easier is Marathon's Family Marketing Program, which I just wrote about in a post this morning. They'll help you create the marketing program with up to four different mailers. More info is just a click away. 2) Add-on Sales: Remember to position your holiday promotion with new ideas and products from your lab, album company and other vendors you work with. Don't just sell somebody a print - promote a framed print. Check out canvas wraps, metal prints - things that people don't see very often. It might be old hat to you, but not to most of your customers. How about a second album of that wedding you shot for the grandmother? Or, a large signed print of the bride and groom as a Christmas gift from Mom and Dad. It's also the perfect time for video holiday cards. Whether it's goodwill saying thanks to an excellent customer or a new revenue stream, don't let the season slip by without video presentations. Here's a link to some great help from the "Queen of Hybrid," Suzette Allen. 3) Back to School and Homecoming: I'm always amazed how few photographers go after this segment of the business. I know it's not big bucks, but it isn't always about the direct revenue - sometimes you have to focus on the publicity you can create to build brand awareness. Here's where it would be great to team up with a couple of partners like the local limo company and a florist. Put together a homecoming package with the limo, flowers and two 5x7's. The three companies can share the cost of the mailing, and each partner becomes an ambassador for the other partners. 4) Halloween: Sure it's an obvious opportunity, but if that's the case then why don't more photographers tie in promotions. It's kids and family time. 5) Who's doing the Kiwanis holiday party this year? Every community has a group like Kiwanis, Rotary, Exchange Club and Lions. Each year they typically do a holiday party. Why not suggest portraits of the guests as part of the actual event? Then, work with your lab on a folio with the group's logo on the front and yours on the back. 6) Giving Back: Don't forget to look for charitable opportunities to tie in photography as a way to give back to your community. It's another promotional opportunity to remind people who you are in the community and your desire to give and not just take. 7) Your Blog: Your website is about what you sell, but your blog is about what's in your heart. Don't miss opportunities for content about the importance of capturing memories and the experiences that fly by during the next few months. The seasonality of the fourth quarter offers so many different opportunities for family-centric images and posts. Creating awareness for concepts like these, especially if you've never done them before, takes time. You might not hit one out of the park your first time at bat, but remember to get a few shots of you working with clients for your own press releases. Build a stash of images of you being involved in projects like these so you can create awareness in the community with more press releases in the future. And don't forget to look for partners! This is consumer bundling at its best, and you've got limo companies, florists, venues, caters, tux and gown shops, salons and even other photographers to help you absorb the promotional costs and create the excitement! You don't have to pay for everything on your own. Plus, when you bring in partners for a direct mail piece, for example, you not only reduce the cost, but you all become ambassadors for each other. Over the next few months, you've got dozens of opportunities to plant the seeds for photography as this year's number one holiday gift, but it won't happen by itself. You've got to market the concept and look for partners to help you stir the pot!  DPG Editor Joe Tepper heads down to the Sunshine State to check out the latest shark hotspot It took a while for me to wrap my head around the Polaroid Snap Touch--and it's not because I'm not accepting to what they're doing. It's more because of the fact that they're finding a way to appeal to the Snapchat generation in the form of a camera. Personally, I don't use Snapchat and never used it for anything else besides dating. When it comes to instant film cameras, I prefer, well, instant film. That's one of the biggest issues right here. The Polaroid Snap Touch doesn't use actual Polaroid film or even anything close to it. Instead, it uses zInk paper and has a printer built into the camera. You could say that it helped influence the Fujifilm Instax Square SQ10. And even then, I'm really not the customer for a camera like that simply because I know what's possible with the actual film. The 2017 Wetpixel Whale Sharks trip kicked off today in Isla Mujeres, Mexico. Strictly speaking, it started yesterday, with the team arriving at the Playa la Media Luna hotel throughout the day. Today was our first trip out on the water though, so it counts as Day 1! There are six participants, and after a quick briefing over breakfast we made our way out to the golf carts that are used throughout the island to get around. Sadly, one of the carts decided that starting today was going to be an issue. When in Mexico, it is important to think on the hoof, so we used the remaining working cart to ferry everyone down to the jetty. Despite this, we were still away by just after 8 am. While we were cruising towards the North to find the sharks, our skipper, David was explaining the new permit system that is now in place for operators that wish to take groups out to see the sharks.  Each captain and crew member must mow attend a course on correct interactions with the sharks, and there is now a maximum of 2 people plus a guide allowed in the water at a time. On our trips, we have 6 people maximum on the boat, so this allows for plenty of interaction with the sharks. David also mentioned that in order to get the permits, staff from Keen M literally camped out at the government buildings. The number of permits that are issued have been significantly reduced, which increases the pressure to get the ones remaining. The goal is to limit the number of boast visiting the aggregation to reduce the environmental impact. On a very subjective measure, the number of boats out on the water today did seem less and they seemed to spend less time with sharks. The bulk of them had arrived by 10 am, but by 1.30 pm, they had all gone. After an hour or so, we found big group of shark and the first group of three entered the water. There were large number of sharks all around the boat feeding on the numerous bonito (Sarda sarda) eggs that are in the water. The sharks gather off Isla Mujeres to feed on these small eggs, the largest fish in the oceans gathering in vast numbers to feast on them. Pretty soon we found a shark that was performing a botella or bottle. When the whale sharks find a patch of particularly dense food, they stop swimming. Their normal feeding technique is known as ram feeding. Essentially, they swim while opening and closing their mouths using their momentum and the suction of the mount movement to force water through their mouths and out through their gills. When they stop, their tails sink and they then adopt a vertical position in the water. By opening and closing their mouths they literally gulp the plankton rich water and push it through their gills. This vertical feeding behaviour has only relatively been scientifically described. While they are in a botella, it is possible to approach the sharks quite closely, as long as this is done carefully, calmly and slowly. Everyone in the group was able to capture great images and spend plenty of time in the water. We had over 100 sharks in a really dense grouping. Looking forward to lots more tomorrow. Tagged: trip report, whale sharks 2017 |


 RSS Feed
