
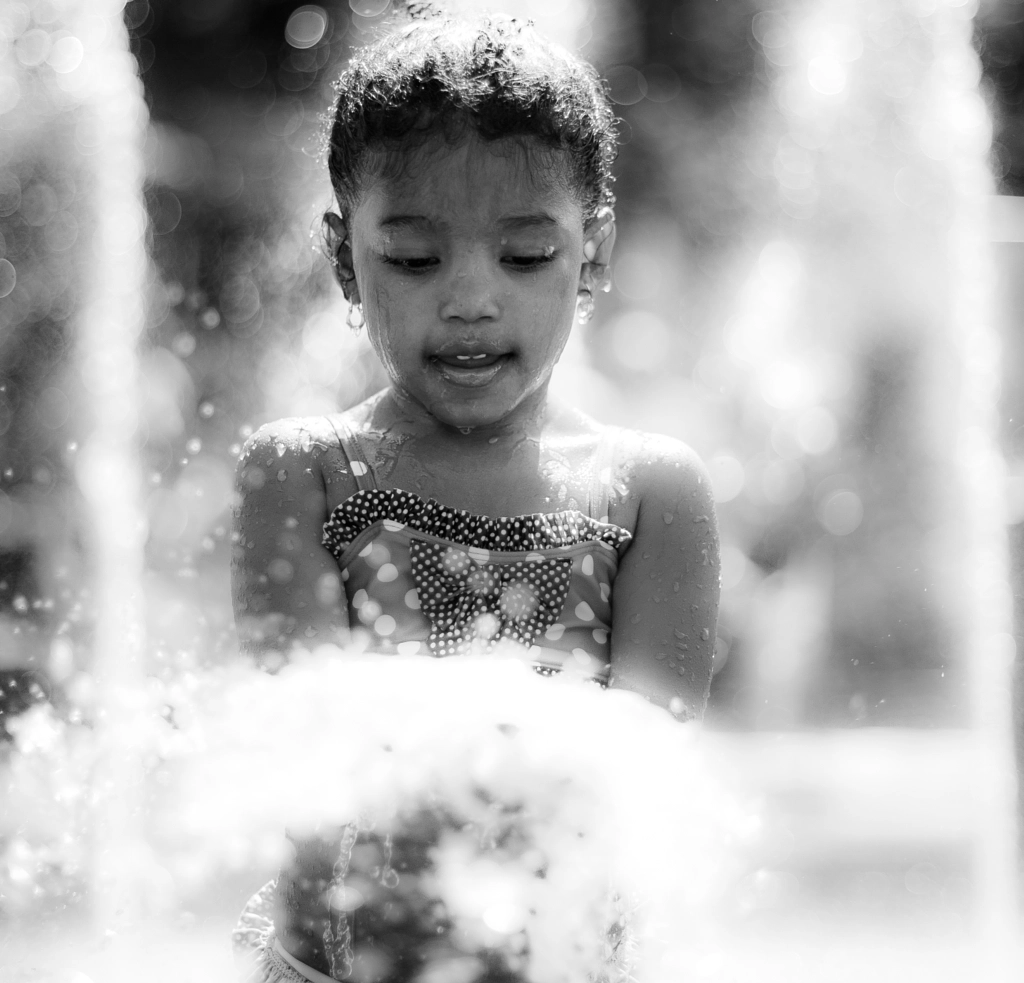
A diver has captured shocking video of a dive guide in the Bahamas losing his cool with some nurse sharks that try to steal chum from a bait box
|
A diver has captured shocking video of a dive guide in the Bahamas losing his cool with some nurse sharks that try to steal chum from a bait box
0 Comments
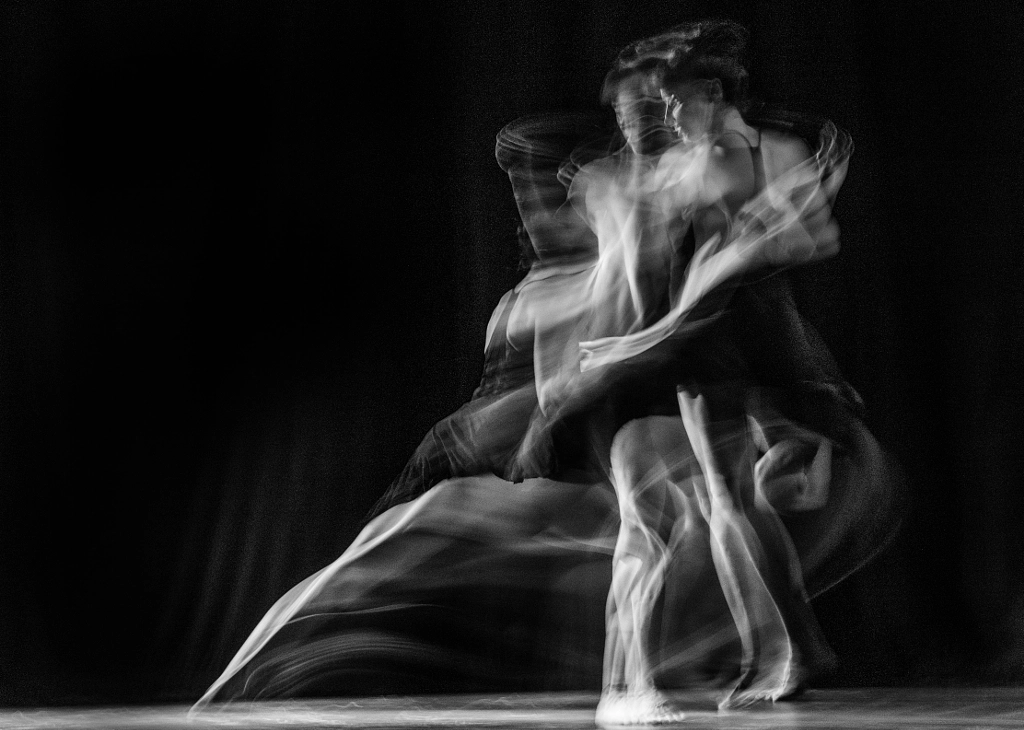
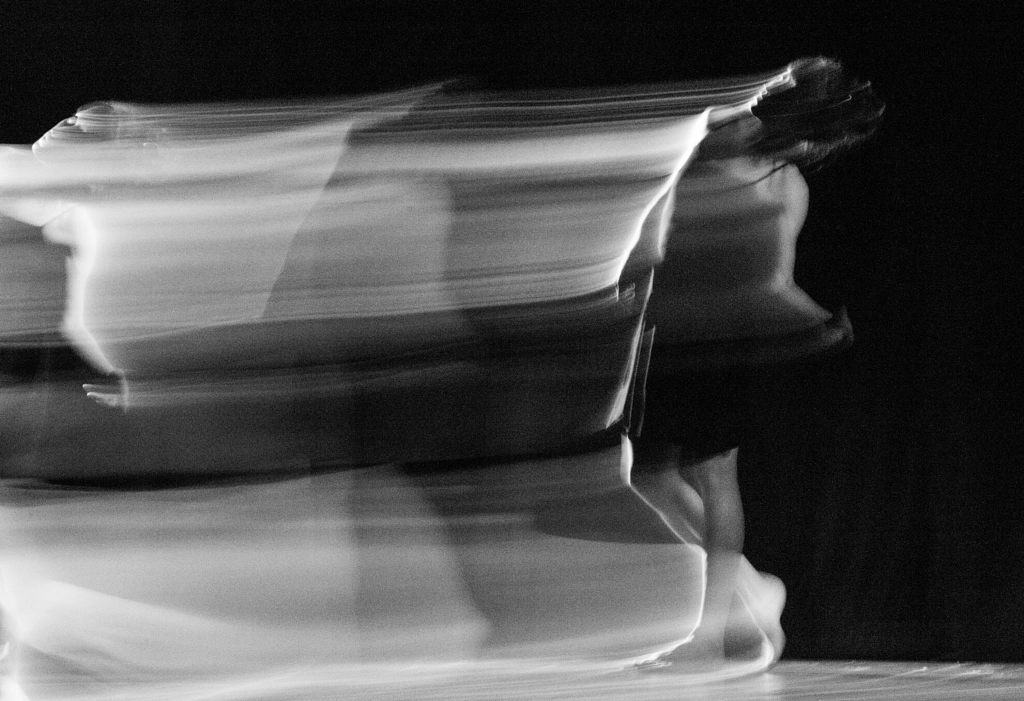
Introducing Nauticam's WACP - The Wide Angle Corrector PortBy Alex MustardAlex Mustard presents a detailed examination on the philosophy behind and the performance of Nauticam's forthcoming Wide Angle Corrector Port - WACP, a product aimed squarely at serious full frame stills and video shooters. Alex introduces this new product, explaining why a water contact lens offers advantages over dome ports (in plain English, wherever possible), and shares thoughts, data and a portfolio of images that may change the way we think about achieving maximum image quality underwater.  WIDENING THE BOTTLENECKAs I settle down to write this, Nikon have released the new D850 with 46MP and according to my Facebook feed, scores of my friends have found their new camera and are busy emailing manufacturers telling them they need the housing now, or ideally yesterday. Nikon, Canon and Sony all now offer full frame still cameras that exceed 40 megapixels and for our video shooting brethren, the message from their manufacturers is that you are wasting your time pressing record if it is only 4K, even more resolution is clearly the future! And while those with older cameras might chuckle at this pixel chasing, I think we'd all like our best shots to be captured at the optimum quality, in the highest possible resolution. A consequence of ever increasing resolutions is photographers can look deeper into the detail of their images than ever before. And we don't always like what we see. As a result, we've all become a pickier about image quality, not only compared to when we squinted through a loupe on a Lightbox, but also compared with digital cameras of just a few years ago. It's understandable that when we've invested in the latest and greatest camera we want to extract its full performance underwater. There's an old saying in underwater photography that if you want better pictures, don't buy a better camera, but spend your money on diving in better water! But jokes aside, as long as we are close to the subject, as good photographers invariably are, the problem is rarely the water, but the optical problems of shooting underwater. Therefore, the biggest bottleneck to image quality is not the water itself, but the barrier between the air inside the housing and the water beyond (and what shooting through this does to the image quality.) A dome port is the typical solution in wide angle photography. Domes have many pluses, but by making the air-water interface curved they introduce some serious degradation to our image quality. The most common manifestation, that we are all familiar with, is the blurring of detail in the corners of wide angle photos. This problem is most prevalent on full frame cameras, with small dome ports, incorrectly positioned dome ports, at more open apertures and with rectilinear, rather than fisheye, lenses. It is this problem that Nauticam is addressing with their new Wide Angle Corrector Port, which uses fully corrected water contact optics to tackle the limitations of a dome port. The aim is to create a wide angle zoom, with a maximum field of view (FOV) of 130, which is wider than either the Canon 11-24mm (126 FOV) or Nikon 14-24mm (114 FOV), that also produces excellent underwater image quality across the frame, even at more open apertures.  WHAT IS THE WACP? The WACP is a lens and a port all in one. It is designed to be used in front of a standard land lens (up to 28mm on full frame, which provides the autofocus, exposure control etc.), while the WACP corrects the lens to see perfectly underwater and expands it into a wide angle with a field of view to 130, introducing some mild barrel (fisheye) distortion. To perform this transformation the WACP contains multiple elements of high quality optical glass about 3 kg worth or well over 6 lb, all there to deliver excellent image quality underwater. If you are familiar with Nauticam's WWL-1 lens, you can think of the WACP as the pro version, intended expressly for full frame stills and high-end cinematography. Like the WWL-1, the WACP is designed to work with lenses with a field of view up to 75 (14mm on M43 or 28mm on FF). This gives plenty of options for full frame photographers, including 28mm prime lenses and zooms, such as the 28-70mm. However, lenses with really large front elements don't work well with the WACP, and physically smaller lenses actually give the better results. Nauticam initially favored Nikon 28mm primes (f/1.8 and f/2.8) in their tests, while in the field, I favored the versatility of a 28-70mm (f/3.5-f/4.5), which becomes a 130 to 57 FOV lens (for comparison the Canon 11-24mm is 126 to 84 FOV and Nikon & Canon 16-35mm are 107 to 63 FOV). So far the testing has been Nikon biased, but the WACP is not restricted to any brand of camera or specific lenses. Also, like the popular SMC, there is no reason that the WACP can't be used with any housing brand (with an appropriate adaptor).  Page 1: Underwater optics issues and the WACP. Tagged: alex mustard, articles, nauticam wacp In the headlines this week: A controversial critique of the Polaroid comeback, an update on the photographer shot by police and new gear promising to be the only light you'll ever need. These are just a few of the things worth discussing in this week's photography news roundup. 1. Does the return of Polaroid point to a lack of innovation?The instant camera's return with the launch of Polaroid Originals was cause for celebration in many photography circles - but not everyone is jazzed about the comeback. A columnist for The Guardian argues that the revival of Polaroids represents the Millennial generation's lack of imagination, and a preoccupation with the lives of previous generations that might be inhibiting innovation. What do you think? Does crushing on old photography methods mean you're not focussed enough on experimentation? Or is the past just another source of inspiration? Share your thoughts in the comments! Source: The Guardian 2. Update on Andy Grimm, the photographer shot by policeAndy Grimm, the Ohio photographer who was mistakenly shot by police earlier this month, spoke to Fstoppers about how he's been doing since the incident. Grimm also shared his safety tips for photographers shooting around law enforcement. Read the full interview here. Source: Fstoppers 3. Gear to get your light game strongA new LED system promises to solve all your lighting problems: Spekular from Spiffy Gear is made up of four individual LED sections that can be rearranged into different shapes (or disassembled for separate lighting units) to suit your needs. See if it lives up to the hype with DIYPhotography's test-drive post here. Source: DIYPhotography 4. Zahra Saleki in the spotlightToronto photographer Zahra Saleki is featured on Booooooom's #TheCreatorClass for her project This Storm is You. Saleki's project employs images of dance to share her immigration story. Her mesmerizing use of motion and focus makes her work on 500px equally intriguing. Source: Booooooom 5. Craig Whitehead on a photographer's greatest assetAnother familiar face popped up on Fujifeed this week: Craig Whitehead, who recently taught a 500px Class on street photography and working with light. One of the insights he shares in the profile is his belief that instinct is more important for photographers than technical knowledge. Agree or disagree? Let us know in the comments! Source: Fujifeed Highlights from Editor's ChoiceHere's a look at the photos we're currently loving, curated by 500px guest editors Blake Pleasant and Marta Syrko. The post Photography News Roundup, September 29 appeared first on 500px ISO. Earlier this year I was visiting a few cameragear factories in Shenzen China. Aside from getting my phone nicked in a cab ride, it was an enlightening experience. One of those factories was the Small Rig factory. If you are following the blog, you know how much we love our A7 cage (and a bunch [] The post How camera cages are built appeared first on DIY Photography. Legendary and respected Japanese camera manufacturer Nikon finds itself at the heart of a scandal following its selection of an all-male cast of photographers to be Ambassadors in a marketing campaign for the new Nikon D850 DSLR in Asia, Africa, and the Middle East according to Petapixel.  photo by Parag Deshmukh The cadre of photographers, 32 in total, focuses on professionals in the field of photography and well-known names such as fashion photographer Cameron Grayson and art photographer Patrick Cheung. With such an expansive and long list, many question Nikon's decision to not include a single female photographer in its list of luminaries. FStoppers published an article titled Is the Nikon D850 for Men Only? on its website, wondering aloud if this is a deliberate decision on the part of Nikon's team or an honest mistake. With anger growing in the community and on social media, Nikon Asia's Twitter account (https://twitter.com/NikonAsia) responded directly to the controversy, saying: Unfortunately, the female photographers we had invited for this meet were unable to attend, and we acknowledge that we had not put enough of a focus on this area. We want to thank the community for raising this and challenging us to do more to support the creative talent of our female photographer community. Enabling the creativity of our community sits at the very heart of Nikon and we will continue to keep improving on our innovation and our support for you. As FStoppers notes, Nikon fails to note which female photographers were invited to be a Nikon D850 DSLR Ambassador, a curious omission in a statement many would interpret as exculpatory in nature. DIYPhotography spoke with female photographer Rebecca Douglas, author of an open letter to Nikon in regards to the lack of female representation in the Nikon D850 Ambassadors marketing campaign. The letter, which recounts Douglas' love affair with Nikon products and a showcase of work she has completed using Nikon cameras, urges Nikon to reconsider this approach to the marketing campaign and highlights what could be interpreted as sexist or gendered language in its previous marketing to women. She writes, Unfortunately, sometimes gender is perceived to be one of the elements that makes up a role in a profession and this was out lawed a long time ago as discriminatory. Unfortunately, this industry in some areas seems to have a bias towards one set of gender assumptions and technology. Douglas' letter received a response from Nikon UK which stated []female photographers were unfortunately not represented and this was completely due to circumstance and not design. At a global level, Nikon has invited four photographers to act as Ambassadors for the launch of the D850, one of which is Italian photographer, Rosita Lipari. Curiously, the statement from Nikon UK, a territory in which the campaign will not be a feature, included vital information omitted by the Nikon Asia response, namely an actual female photographer who was considered for and could not participate in the Ambassador's program. The case of the Nikon D850 product launch is a cautionary tale that reminds marketing directors the world over of the increasingly global nature of product promotions and marketing campaigns. The need for a global, rather than local, approach means that the materials put out by the company should not only consider the local audience but also the global audience for that product as well, a tough task for any team. Without this attention to detail, however, the task of marketing becomes even harder if your product is perceived as gender-biased and exclusionary. These features tend to depress sales and shrink bottom lines, two things Nikon will want to avoid to remain a viable business concern. The post Female Photographers Can't Be Nikon D850 Ambassadors? Controversy Ensues After Nikon Asia Omits Women appeared first on Light Stalking. I have lost track of the number of times I have heard complete strangers compliment me on having a great fancy camera that takes great pictures. Initially, I used to be quick to the defense and try and get a word in on how I am a professional photographer and hence have some level of skill in my craft. But now I just nod, smile and quickly move away. Unfortunately, the reality is that a lot of photographers (and others) think that by having the latest and greatest fancy camera, they have the ability to take better photos. The truth of the matter is that you don't need the latest equipment or fancy qualifications to be a good photographer. Photography is a creative art form and like any art form, it takes a lot of hard work, practice, and perseverance to get really good at taking great pictures. Sure, you need to really understand your gear and what it can and cannot do. But there are loads of simple, non-technical stuff you can do to improve your photography as well. Here are some non-gear related tips that will help you take better photographs. #1 Take your camera everywhereYou never know what might be around the corner, be it close to home or on your far away travels. Life is unpredictable and things change in a split second. There's alwayssomething interesting to photograph. You just need to open your eyes, look around and be ready to snap that shot. And additionally, make sure your phone or camera of choice is within easy reach ready for that shot.  Cows hitching a ride inside trucks is quite a sight especially on narrow streets in India!  These migrating pelicans found the most electric resting placeshopefully, they got re-charged for their next flight. #2 Take pictures every dayOvernight success is a myth. The sooner you realize that the more at peace you will have on your photographic journey. We all know that to get really good at anything, we need to practice and practice a lot. After all, practice makes perfect. The more pictures you take, the better you will become. Don't get hung up on what you're using to take the pictures, either. Many times I only have my iPhone with me and take a shot if it catches my eye. Be confident that if done correctly, you can make good pictures with any camera.  Cupcakes and coffee = great food editorials shots.  Other times it is just a bowl of fresh fruit that can spark an inspiring photo. Don't get hung up on the perfect scenery let your imagination be your guide for your everyday shots. #3 Analyze other photographsSeek inspiration in other photos. Look at pictures you like and ask yourself what you like about those pictures. What makes it interesting to you and why? Also question how you could make it better or do it differently. Don't be afraid to try something similar and put your own creative spin on it. Take an old idea and make it your own. That makes it different, new and in turn, you just might make it better than the original.  A recent obsession in the study of effectively capturing movement in photographs led to a multi-exposure frame one of my personal favorites to showcase my creative journey. #4 Study yourimagesBecome your own best critic. Question everything. Look at your pictures and ask yourself what you like and what you don't like. Be completely honest with yourself as this will really help you improve your craft. Sometimes it is also beneficial to repeat the shot and change it up to make it better than your own original. And when something works, celebrate your success. It is very important in your creative journey to celebrate your own milestones it makes the journey that much more fun.  This is the view from my home in Bombay and I love photographing the sea bridge one of the technological marvels of the modern world at different times of the day and in different weather conditions. It is amazing to analyze how light and color changes the whole perspective of an image.  Of course, night shots have their own charm. Next time I shall remember to take my tripod along for some car trails! #5 Stop, look and then clickMost of today's fancy cameras have a continuous shooting mode where you can fire away at six to eight frames per second. But I find that this tends to make us lazy as photographers. We take on the mentality of the spray and pray theory that if we take 20 shots of something, chances are at least a couple will be worthwhile. Yes, taking loads of pictures is great. But if you pause and take a few seconds to really observe your surroundings, you will be able to visualize your shot. Think about how you want your picture to look and do what you need to do to achieve that look. It might mean moving position, waiting for the light to change or the crowds to dissipate, but it could be the difference between a good photo and a great one.  We were walking along the narrow street of Vridhavan in India and this cow was ahead of us. We just stopped to see what he was doing and also to give him a wide berth as he was a very big bull. He calmly walked into this abandoned house and just made himself at home. It's not every day that you find cows lounging inside your house. ConclusionI hope these simple yet powerful tips help you take better photos and improve at your skill and craft. Remember it is not the camera that takes a great picture but the skill of the person behind the camera that gets the money shot. The post 5 Non-Gear Related Ways to Improve Your Work and Take Better Photos by Karthika Gupta appeared first on Digital Photography School. Take a look at the winning entries from this year's Astronomy Photographer of the Year competition.
Clay Cook is an Advertising and Editorial photographer who has worked with clients ranging from the NFL to Red Bull, and been published in Forbes, Popular Mechanics, Adweek, USA Today, ESPN, and more. To see more of his work, visit his website or follow him on Instagram. This article was originally published on Clay's blog, and is being reprinted in full on DPReview with express permission. We all have our dreams, some are simple while others are complex, buried with the overwhelming mountain of hurdles. I began my creative career in the one of the most complex industries: music. The business of music is just like any other business, except it's competitive and hard to navigate as a poor teenager who lives in their parent's basement. But somehow I survived for a few years, and I have the scars to prove it. We toured and recorded albums, yet never seemed to make it where we always dreamed to be. One minute we had a breakthrough, the next we took ten steps back. I often think about what was to blame, or who was to blame. But in the end I chock it up to timing. We happened to choose one of the worst times in the history of music to succeed. Free music was the new thing and the sales of compacts discs were crashing at an alarming rate. I often felt like my band was running on a treadmill, covered in sweat, yet never making any big leaps toward fame, fortune and my dream: to be my own boss.
It's not often that people live out their dreams. But, what happens when you do? What happens when you achieve every single goal in your path? How do you plan for the future when you have nothing to chase? These are questions I recently had to ask myself, because I accomplished the one dream that had been hanging in my head since I started photography. It may seem simple, but for me it was complex. My dream was to photograph Jennifer Lawrence
I grew up most of my adolescent life in a nice neighborhood, my family owned and operated a successful distribution business, so we lived a good life. Through the music industry I learned a lot the hard way, but was setup to succeed from an early age. Several houses up from ours lived the Lawrence family: Karen and Gary, two brothers Blaine and Ben and a bright-eyed, spunky-blonde Jennifer. Throughout high-school, my older sister dated Ben for a few years and often babysat young Jennifer. While I didn't have much of a connection to Jennifer or the Lawrence family, my sister certainly did. As we grew older, we went to different schools and Jennifer eventually moved and didn't think much about it. That is until some years ago, when I received an email from my mom alerting me that Jennifer Lawrence, the girl down the street was to be in a movie with Charlize Theron called Burning Plain. I watched the film and smiled. When Jennifer starred in "Winter's Bone" and took home the Academy Award, I felt proud. In a small town such as Louisville, Kentucky everyone seems to have their connection to Jennifer. While my connection may be more significant than the grocery clerk that helped Jennifer's cousin find powered sugar one day, it's not a connection where I claim to be close.
Today, Jennifer Lawrence is considered one of the most popular A-List celebrities in the world, a title that is well-deserved. I not only wanted to photograph her, but I wanted to do it organically. I wanted to work as much as possible to be the photographer chosen to capture Jennifer for "X" client. I constantly kept it in the back of my mind and didn't tell many. It was a long term goal, one I expected to require years to achieve. I wanted to earn it. Shortly after the safe return from our adventure in Iraq, I received a call from my friend Coury Deeb, Founder of Nadus Films-a production company based in Louisville that works heavily the non-profit industry. Coury had been working closely with Meredith and Karen Lawrence, who collaborate with Jennifer for her foundation. The Jennifer Lawrence Foundation supports various other non-profit organizations with a primary focus of children in need. The Lawrence family were neck deep in planning the "The Power of One" fundraising event presented by the Jennifer Lawrence Foundation and the Frazier History Museum; which recently just opened the doors to The Hunger Games: The Exhibition. The interactive exhibit features actual costumes and props from the production of The Hunger Games series. It's a massive exhibit that soaks up the focus of the entire museum. It totally made sense to utilize that atmosphere to host this fundraiser. Lucky for us, the foundation was interested in having the event captured Nadus style. While over numerous meetings and countless ideas, we landed on a plan of action. Nadus Films would document the event while I photographed Jennifer in two studio sessions. One being a portrait sitting with various children that the foundation supports and the other being a portrait sitting with her solo and a few friends who are attending the event with her. Leading up to the event we hit a few hurdles. The portrait sitting would have to be quick, it would have to feel more candid and most importantly, we had to keep it fun. No big deal. I then made a few calls to some friends in the photography industry. First, Sarah Oliphant of Oliphant Studios. I had envisioned a dramatic black and white candid portrait with the children. A mood that felt very light-hearted, yet natural and intimate. I wanted to use a dark background, but with enough character to float behind the subject. In other words, I didn't want Jennifer to fall into blackness, I wanted some gray surface texture to lift the contrast. I don't often work with black as a background but gray, so I was thrilled when Sarah provide an option that could cater to my vision. On the flip side, it would be an alternate background with more of a warm tone and a strong vignette. A background that more of a standard style of what you would see in a Leibovitz photograph. I would use both of these canvas backdrops over a period of two days.
The next call was to Digital Transitions-a New York based retailer for Phase One and various other top professional photography brands. I can depend on Digital Transitions for providing a quick rental program for the Phase One system. In this case: a Phase One IQ3 80MP XF Medium Format Camera with a Schneider Kreuznach 40-80mm LS f/4.0-5.6 Lens. The reason I chose to shoot with a medium format over my workhorse a Canon 5D Mark III is actually several reasons. Firstly, I wanted the resolution. I didn't quite know what to expect. I knew the shoot would be very quick and fast-paced so the massive resolution of the digital file would provide a breath of options in post-processing. We could crop in dramatically or alter exposure without sacrificing the image quality-in other words, it was a safety in case I just can't nail it in camera. Secondly, I wanted the beautiful buttery look that a medium format camera offers, which if used right can resemble film. While I prefer a deep depth of field in most of my photography, I wanted this particular series to feel warm and soft with a dramatic aura.
I felt confident about the tools in play, I just needed a plan of action for the setup including lighting, logistics and safety. With Jennifer Lawrence, I wanted to provide as much breathing room as possible. I knew we wouldn't have but a few moments, so I needed the set to be versatile. It had to be the right light, open enough to offer multiple posing options without a change. Therefore, we went big and soft. For both sessions we opted to use a Profoto D1modified with a 51 Large Profoto Deep White Umbrella with a 1.5 stop Profoto Umbrella Diffuser as a key light. As a fill light, we used a Profoto D1 modified with a 65 Extra Large Profoto Deep White Umbrella with a 1.5 stop Profoto Umbrella Diffuser. We feathered the key light to soften shadows and offer a more natural nature of light. The entire set was draped in black cloth to negate the bouncing of light and increase the density of the shadows on her face. I was nervous. Although the bath of anxiety wasn't caused by the fact that this was the most popular and successful celebrity that has stepped in front of my lens. It was because I wanted the image to honor Jennifer, and for my photography to align with her brand and our client The Jennifer Lawrence Foundation. We arrived at the venue early, only to receive some bad news: the shoot with the children was cancelled. I felt disappointed, but was thankful for the opportunity to have the second day. Nevertheless, we loaded in all of our equipment just in case... I'm glad we did. Within an hour of the event taking place we received word that our portrait session with the children was a go, with only an hour window to prepare. Fortunately, this wasn't our first rodeo with this style of project and we were prepared for anything to be thrown our way. We had our location, we had our equipment and my assistants prepare the set while I mingled and covered the opening of the event. I spent a brief time pre-staging, pre-lighting and make sure all the preparations were made which we had planned for. After a quick autograph session, I tagged along with Jennifer through The Hunger Games: The Exhibition and led her to our mock-studio where we would photograph her with a few select children. This walk provided the time to briefly catch-up and make a connection. As we arrived to the set, I pointed to a stool we had setup and began to hand-select various children. I made sure to keep her attention while we made slight adjustments to the light and brought in our first subject.
Jennifer had never met most of these children, so it was then my job to make the awkward moment fell just right. I fired the shutter while I did my best to guide Jennifer and the children to have more of a conversation, at the same time punched in awkward jokes to bring out some laughter. Instinctively, Jennifer jumped in and helped the process. While I was only able to fire several frames per child, I was confident in what we we captured. After four sets of children, a small technical glitch and nearly 30 frames later, Jennifer bailed and headed out of the venue for the evening.
After the shoot, I felt fairly confident in the candid portraits, but naturally was hard on myself for my equipment acting up. Apparently, radio signals from the radios used in the building for the event had conflicted with our radio triggers used in the portrait setup and caused the lights to fire in an extreme rapid pace, resembling a theater strobe for about four seconds. Luckily, it was during our final set, but it was certainly a learning experience.
The second day started early as we had a lot of setup and didn't want a repeat of the hiccup from the previous day. Therefore, we spent meticulous time with the lighting and staging. While the set would primarily be used for a professional portrait-booth for guests of the fundraising event for the evening, our priority was the solo portrait of Jennifer. After nearly four hours of staging, we were ready. I vividly remember pacing back and forth several minutes before Jennifer arrived on set. We got word that she would be arriving with an entourage, which included Frances Lawrence, Director of The Hunger Games film franchise, which only added to the pressure. This was my opportunity to open doors and it had to be right, it had to be perfect. As Jennifer walked towards the set I gave her a gentle hug, asked her take a breath and sit next to a posing table we had pre-staged hours beforehand. After a 10-second spew of small talk, I picked up the Phase One IQ3 Medium Format Camera, focused and snapped the shutter. With one sudden pulse of the flash all the anxiety went away and I felt a push of adrenaline. With a swiftness, we blazed through various positions I had pre-set and thought out. While Jennifer needed little direction, the smallest ideas helped her provide the expression I was seeking. After just eight photographs, Francis jumped in a for a couple of frames. I did my best to make a stiff moment more awkward, which resulted in both of them bursting in laughter. We kept it fun, we kept it light-hearted, and it was quick. Just 10 minutes later, after a gracious good-bye, Jennifer and her entire crew were off to the next engagement. I set the camera down, stepped back and exhaled a burst of air. After a moment of pause, I promptly walked over to my MacBook and reviewed the imagery; I was proud. The rest of the evening came as a relief and we blew off some steam with a few cocktails. As a professional photographer, it's my job to make the process easy and quick. Despite having been in hundreds of campaigns, dozens of films and on nearly every major magazine cover in the world, Jennifer and her team relied on my professionalism, intuition and eye. She trusted me to produce something special. Those 48 hours were a thrill ride, I'll never forget. If you're struggling to attain your dream: wander, investigate and inquire. You never know what's around the corner or what a handshake can do. Your life can change in a instant, mine certainly did. When I first watched Jennifer on the big screen, I had no idea that our paths would one day cross. At that time, I wasn't a photographer, just someone who desired more and worked relentlessly to accomplish a dream. I can only hope I have another opportunity to photograph J-Law, but in the mean time, I'll be climbing the mountain towards the next dream. A special thanks to Nadus Films, Jennifer Lawrence, Karen Lawrence, Meredith Lawrence, Andy Treinen, Frazier History Museum, Ina & Marcella Events, JP Davis, Fund For The Arts, Jordan Hartley, Hunter Zieske, Louis Tinsley, Stacy Swiderski, Digital Transitions and Oliphant Studios.
Guiding a viewer through your images is part of the skill in developing as a photographer and can be a huge part of getting powerful compositions. But how does a photographer draw the eye? Truth is there are MANY ways, but here are three basic ones that you can work on today in your photos.
Image from Pexels by Julia Caesar Take a look at the image above by Julia Caesar to see an example of what we mean. It uses all three of these elements to draw the viewer's eye to the person in the image. There are a few exposure problems, but the bright, colourfully dressed person who contrasts against the epic landscape most definitely draws the eye. You cannot help but look straight at them! Now, these elements are very useful, but this is only the beginning of how you can use compositional elements for more powerful images. Take a look atAdvanced Compositionif you want to take your composition skills to the next level. The post Bite Size Tips: How To Draw The Eye In Photographs appeared first on Light Stalking. How to deal with the unfortunate facial expression in group portraits Ah it's that time again! The time when we are challenged to capture the idealized family portrait to send out to friends and family. To help you along, I'd thought I'd share a technique for a common problem with group portraits. Most of the
Remember those intriguing teasers Polaroid was scrolling through on its main website last week. Well, yesterday night was when that countdown ended, and it ended with a huge announcement that has the photo industry buzzing. In short: the old Polaroid you knew and loved is back from the dead with a new analog instant camera and a new type of instant film! Announced on the 80th anniversary of the Polaroid brand, both products are being unveiled as part of a new brand called Polaroid Originals, which merges the Polaroid of old with years worth of work done by Impossible Project to keep that old Polaroid alive. In fact, the Impossible brand is being replaced altogether. In addition to the new film and camera, you'll now be able to purchase restored vintage Polaroid cameras and traditional Polaroid instant film in a variety of formats straight from the Polaroid Originals website. But first, let's dive into that sweet new camera! The Polaroid OneStep 2The Polaroid OneStep 2 is exactly what it sounds like: the spiritual (and in some ways literal) successor to the famous Polaroid OneStep-you know, the camera Instagram stole its original logo from. Inspired by the original OneStep, Polaroid says they've updated the OneStep 2 "to create a simple, easy-to-use instant camera that works straight out of the box." It sports a 'high quality lens' that can focus from 2ft to infinity, a 'powerful' flash, a rechargeable battery that allegedly lasts 60 days on a charge, a self-timer function, and it's compatible with both the new i-Type instant film and the old 600 series film. The camera is available in white and graphite, and you can already pre-order yours through the Polaroid Originals website for $100. Polaroid i-Type Instant Film
Speaking of film, Polaroid Originals also debuted a new film format that will look familiar but is actually a bit different. It's called i-Type, and it joins Polaroid's vintage films (SX-70, 600, 8x10, etc.) as the newest kid on the block. The "i" stands for "Incredible" ... which is really irrelevant. The important bits is that this film is optimized for the OneStep 2-and, we hope, future Polaroid Originals cameras-is battery-free, and comes in Black and White and Color varieties for $16 per 8-pack or $45 for two 8-packs of color film and one 8-pack of black and white. Keep in mind, because this is a battery-free film, it will not work in 600 cameras. That film has its own battery in the film, while the new i-Type OneStep 2 boasts a rechargeable battery of its own. To learn more about this film or purchase a pack or two of your own, click here. Vintage Polaroid Cameras and Film
Finally, since the Impossible Project brand is now a thing of the past, the Polaroid Originals website won't just be a place to buy the new OneStep 2 and i-Type film. You'll also be able to pick up all of the restored vintage Polaroid cameras and older film formats that Impossible kept going all of these years. The old Polaroid 600 cameras start at $120, the famed SX-70 foldable model starts at $380, and Spectra camera models can be had for $120 and up. All of them are available on this product page. And if you need film for those old cameras, you can pick up SX-70 film, 600 film, Spectra film, and even 8x10 sheet film here. To say this is an exciting announcement for the analog photography world is to undersell this by far. The merging of Polaroid and Impossible project as Polaroid Originals would be big news itself, but add to that a new analog instant film camera and a new type of instant film and you've got hipsters, instant photography buffs, and nostalgic shutterbugs like tripping over themselves to support this resurrection. To learn more about Polaroid Originals or any of the products mentioned above, head over to the brand's new website here.  Previously announced as a beta, Davinci Resolve 14 is now available as a final release. It features a claimed 10 times improvement in performance and, with the addition of Fairlight audio incorporated, now offers professional editing, color correction and new audio tools. Resolve 14 is available to download now. There is a free version, with the full DaVinci Resolve 14 Studio costs $299. Press releaseBLACKMAGIC DESIGN ANNOUNCES DAVINCI RESOLVE 14 IS NOW SHIPPINGMassive update to Hollywood's fastest growing professional editor features up to 10x better performance, Fairlight digital audio, multi user collaboration tools and hundreds of new features! Fremont, CA - September 7, 2017 - Blackmagic Design today announced that the final release of DaVinci Resolve 14, its professional editing, color correction and digital audio software, is now available for download from the Blackmagic Design website. DaVinci Resolve 14 is the biggest release in the history of the product, and has been designed to be a complete revolution in post production. DaVinci Resolve 14 is the world's only fully integrated professional editing, color correction and audio solution. It scales from a single user all the way up to the largest collaborative studio workflows. New features include up to 10 times performance improvement, a whole new audio post production suite with Fairlight audio built in, and multi user collaboration tools that let multiple people edit, color and mix audio from multiple systems, all in the same project at the same time. In addition, DaVinci Resolve 14 includes hundreds of new features for editors and colorists, including over 20 new effects such as automatic facial recognition and tracking so customers can quickly refine and enhance faces in their shots. DaVinci Resolve 14 is like 3 high end applications in one. Customers get professional editing, color correction and new Fairlight audio tools. All it takes is a single click to switch between editing, color and audio. For multi user studios, DaVinci Resolve 14 Studio features bin and timeline locking, secure chat, a graphical timeline comparison tool for accepting and merging changes, and more. These features dramatically change post production from a linear to a parallel workflow. Customers no longer have to import, export, translate or conform projects. Everyone can work on the same project at the same time. DaVinci Resolve 14 is the first NLE that offers me all of the professional tools I need in one app, said Eric Wilson, Editor of the hit television show NCIS: LA. The combination of editing, color correction, effects and high end audio, along with 4K multi format support and all of the new collaboration tools, is exciting and innovative. It's going to be a game changer. The public beta of DaVinci Resolve 14 has been downloaded more than any other version of the software in its history, said Grant Petty, CEO, Blackmagic Design. This new version is a major leap forward because it now gives every customer, from individual users to large studios, a way to seamlessly move between editing, grading, and audio. That means they can spend more time being creative and less time translating projects and switching between multiple applications!  The free version of DaVinci Resolve 14, which includes more features than most paid software applications, is available for download from the Blackmagic Design website. For even more creative options, customers can purchase the full DaVinci Resolve 14 Studio for only $299, which is less than the cost of most annual cloud based subscription plans. The paid DaVinci Resolve 14 Studio adds the new collaborative multi user tools, over 20 new Resolve FX including the advanced face enhancement tools, 4K and 120fps project support, stereoscopic 3D, optical quality blur and mist effects, film grain, de-noise tools and much more. Best of all, DaVinci Resolve 14 Studio does not require a connection to the internet or a cloud subscription to work. DaVinci Resolve 14 runs on all major platforms, including Mac, Windows and Linux, making it easy to integrate with existing systems and workflows. Customers running Red Hat or CentOS Linux can even build their own workstations using low cost motherboards, extremely fast processors, massive amounts of RAM and up to 8 GPUs for incredible real time performance. AVAILABILITY AND PRICEDaVinci Resolve 14 is available today as a free download from the Blackmagic Design website for all current DaVinci Resolve and DaVinci Resolve Studio customers. DaVinci Resolve Studio is available for $299 from Blackmagic Design resellers worldwide. DAVINCI RESOLVE 14 DETAILED OVERVIEWDaVinci Resolve 14 features a new high performance playback engine that's up to 10 times faster than before. In addition to extensive CPU and GPU optimizations, customers also get better threading and GPU pipelining, lower latency, much faster UI refresh rates, support for Apple Metal and much more. This makes DaVinci Resolve 14 faster and more responsive than ever so customers get incredibly fluid performance and more precise editing, even on long timelines with thousands of clips. Scrubbing and playback are instantaneous and there is powerful new acceleration for processor intensive formats like H.264, making it possible to edit 4K images on a laptop.  Legendary Fairlight audio is now fully built into the DaVinci Resolve 14 application itself. Fairlight is famous for being used at the world's highest end studios for audio post on film and television. Fairlight is known for both its superior sound quality and its speed. Customers get a massive set of professional audio tools for recording, editing and sweetening, professional bussing, mixing and routing, and multi format mastering to 3D audio formats such as 5.1, 7.1, Dolby and even 22.2. The state of the art, super low latency audio engine is designed to work with 192kHz 24-bit audio with real time EQ, dynamics processing and plug-ins on every track when used with the Fairlight Audio Accelerator. Plus the new Fairlight audio can record up to 96 channels while simultaneously playing back up to 150 audio channels, while mixing it all in real time! There simply is no other software available with this level of dedicated audio power. The new Fairlight audio in DaVinci Resolve 14 supports up to 1,000 tracks and features subframe editing of audio, down to the sample level. The mixer is designed to let customers create sophisticated sequences and has several main, sub and aux buses for mastering and delivering to multiple formats at the same time. Every channel on the mixer features real time 6 band parametric EQ, along with expander/gate, compressor and limiter dynamics. Clip time warping lets customers stretch or compress audio without shifting pitch. In addition, every single parameter can be automated, even VST plug ins, using a variety of automation modes. In addition to audio editing, sweetening, and mixing, Fairlight audio in DaVinci Resolve 14 also includes multi channel recording tools that are far superior to those found in most editing systems. Customers can record voice overs or even an entire symphony orchestra while also monitoring video and multiple channels of dialog and sound effects. The advanced monitoring can handle buses up to 24 channels wide with customizable fold-up and fold-down for crossing between formats. Monitoring can be done on up to 16 different sets of speakers, including massive cinematic installations. DaVinci Resolve 14 works with the Fairlight Audio Accelerator card, which gives customers 100's of zero latency tracks and real time effects processing for EQ, dynamics, and up to 6 VST plug ins per channel. Even without the accelerator, most modern computers can still process more than 60 tracks in real time. In addition, DaVinci Resolve 14 can also be used to drive the entire line of Fairlight hardware mixing consoles, which makes working on complex multi track projects faster than any other system available. The advanced busing and mixing architecture also allows multi language and multi format delivery to be handled simultaneously from the same project, dramatically reducing the time required to deliver final masters. All this editing, color correction and audio post production power also means multiple people need to work on the same job, at the same time. This is where the revolutionary new collaboration tools are vital to the dream of revolutionizing post production. The new collaboration tools completely redefine post production workflows by supporting simultaneous editing, color correction and audio post. Assistant editors can prepare footage while editors cut the picture, colorists grade the shots, and sound editors mix and finish audio, all in the same project at the same time.  New bin, clip and timeline locking lets users safely work on a specific part of the project without overwriting each other. There's also a built in secure chat client that lets team members talk to each other from within DaVinci Resolve without the need for an external internet connection. This secure chat is vital because most high end facilities are unable to use services such as Slack or Skype for messaging because they need to remain completely disconnected from the internet to ensure security against hacking. The new timeline comparison tool makes it fast and easy to see differences and merge changes between two timelines by viewing a side by side comparison of every single change made between users. Best of all, DaVinci Resolve 14 works with the storage you already have. There's no need to buy expensive or proprietary storage and servers to work collaboratively. The new multi user features of DaVinci Resolve 14 eliminate the need for importing, exporting, translating and conforming projects. Customers no longer have to wait for a locked edit before starting color and audio work. Switching between editing, color and audio is just a single click away. That means picture editors, colorists, and sound editors can all work in parallel, making DaVinci Resolve 14 the fastest way to edit, grade, mix and deliver projects. In addition to the incredible performance improvements, editors also get new slip and slide trim commands that make it easier to dynamically trim live on the fly during playback. They can now save interface layout presets, view multiple bins at once and open multiple bin windows. New marker overlays, audio only and video only edit tools, track colors, and subframe audio editing make it the world's most powerful creative editor.  For colorists, there are over 20 new Resolve FX filters that make it easy to remove dust, fix dead pixels, warp images and more. The amazing new face enhancement tool automatically recognizes and tracks facial features so colorists can quickly smooth skin, adjust skin tone, brighten eyes, and even change lip color, all without having to manually select or rotoscope any part of the image. The face enhancement tool is an indispensable feature that colorists will use every single day. In addition, there are new stabilization, match move, and other image processing tools that give colorists more creative options than ever before. Customers can add a DaVinci Resolve Micro Panel, DaVinci Resolve Mini Panel or a DaVinci Resolve Advanced Control panel for the ultimate high speed workflow. All controls are logically placed near natural hand positions and are made out of the highest quality materials. Smooth, high resolution weighted trackballs and precision engineered knobs and dials feature the perfect amount of resistance for accurately adjusting any setting. The DaVinci Resolve control panels give colorists and editors fluid, hands on control over multiple parameters at the same time, allowing them to create looks that are simply impossible with a standard mouse. ABOUT BLACKMAGIC DESIGNBlackmagic Design creates the world's highest quality video editing products, digital film cameras, color correctors, video converters, video monitoring, routers, live production switchers, disk recorders, waveform monitors and real time film scanners for the feature film, post production and television broadcast industries. Blackmagic Design's DeckLink capture cards launched a revolution in quality and affordability in post production, while the company's Emmy award winning DaVinci color correction products have dominated the television and film industry since 1984. Blackmagic Design continues ground breaking innovations including 6G-SDI and 12G-SDI products and stereoscopic 3D and Ultra HD workflows. Founded by world leading post production editors and engineers, Blackmagic Design has offices in the USA, UK, Japan, Singapore and Australia. For more information, please go to www.blackmagicdesign.com. Tagged: news, resolve 14 The Pentax 67 has to be one of the most drooled over medium format SLR cameras ever made. For great reasons too! The Pentax 67 is a film SLR that is more or less designed to be portable and shot handheld by fashion photographers and portrait photographers. For many years it was well regarded and even today, there is some fantastic work that is often done with the camera. Between this, the Pentax 67 II and the Mamiya RB67/RZ67, lots of photographers really have a tough choice figuring out what they want. While some photographers these days may just use a Polarizing Filter for the color benefits, there are other uses. Surely, many of us have struggled with the problem of glare on our photos for countless times. Glare from window reflections, glass displays, and even water have ruined one too many photos. However, before you resign your future snaps to removing glare with Photoshop, you might want to get some help from the trusty polarizing filter first. Ever thought of playing around with colors for your fashion snaps and powerful portraits? You can now do it when you post-process by converting them into modern and stylish duotone artworks.Thanks to design resource website Pixelo, you can now give any image a vibrant new look with their free Duotone Photoshop Actions. The latest version of the Ricoh Theta is official and it offers 4K 360-degree video and spatial audio recording.
|


 RSS Feed
